Contents
What are closed captions or subtitles?
Closed captions (sometimes written ‘CC’) and subtitles provide a written transcript or dialogue of media content such as a video or live presentation or session. Captions or subtitles display on screen in real-time with the media content.
What’s the difference between closed captions and subtitles?
- Subtitles – contains only a transcription (or translation) of the dialogue.
- Closed captions – describe audio cues such as music or sound effects that occur off-screen.
The terms are often used interchangeably.
Why are closed captions or subtitles required?
Captions and/or subtitles are essential for students and staff who have a hearing impairment, for those who don’t understand the language being spoken, or are learning the language, and if someone doesn’t have access to audio (e.g. if they don’t have headphones or are working in a noisy environment). Without subtitles, a student or staff member in any of these situations would find it difficult, or impossible, to engage with the content. Therefore, it is important to have captions on media content or live sessions wherever possible to help with student and staff engagement.
Captions and/or subtitles help make content more usable by everyone. They can help people to engage with the content in more versatile ways – with some captions you can search the transcript to help identify which part of the video you need to jump to.
Visit the web accessibility website for more information and guidance.
Tips for more accurate auto-captioning
- Create good quality audio – if possible, use a headset with a microphone as this can record your voice much clearer than using a microphone that is built into a laptop or webcam.
- Speak clearly and limit background noise – if possible, try and work in a quiet space as this will help your voice to be clearly recognised.
Auto-captioning on live sessions or meetings
Chrome Live Captions
Chrome live captions are available for any media, audio or online sessions including live or pre-recorded Blackboard Collaborate sessions when accessed using a Google Chrome internet browser.
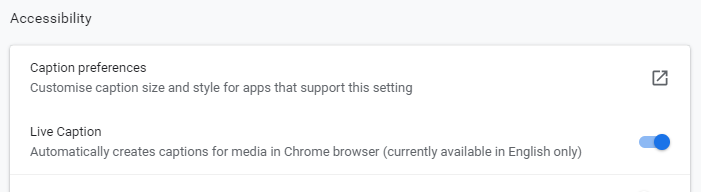
The live captions will automatically appear when you turn on the live captioning feature within the advanced settings of the Chrome browser.
The live captions window can be moved around to an appropriate location on your browser. They can also be customised to suit your preferences by changing the font, size, and colour from within the advanced settings.
Note: The Chrome live captions cannot be saved or downloaded.
Zoom Live Transcription
Zoom’s live transcription feature (available from September 2021) can provide automatic captioning during a meeting through the closed captioning setting.
Step 1: Enable Closed Captioning before Zoom meeting
To enable the closed captioning setting in your account, login to your Zoom account via shu.zoom.us and choose Sign In. Enter your usual staff username and password.
Access Settings via the left-hand menu. Select In meeting (advanced) on the second left-hand menu.
Locate the Closed Captioning option in the list. Enable Closed Captioning and tick the option allow live transcription service to transcribe meeting automatically. Click Save.
Note: when you turn on this setting in your account it will be remembered for all future Zoom meetings.

Step 2: Host enables Live Transcript in Zoom meeting
When hosting a meeting you will have the option Live Transcript alongside the usual in-meeting options at the bottom of the Zoom window. Select Live Transcript and then click Enable Auto-Transcription. When enabled you will see the closed captions appear at the bottom of the screen when any participant or host talks.
![]()
Step 3: Participants enable or request Live Transcript in Zoom meeting
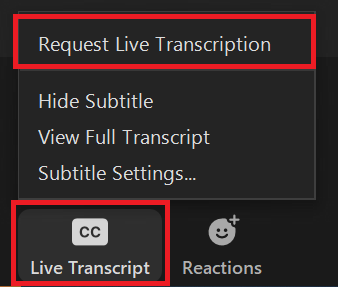
Participants will see a Live Transcript option in the Zoom meeting.
If the host has enabled Auto-Transcription in the meeting, participants can turn them on if they wish by clicking Live Transcript and then Show Subtitle. They can choose Hide Subtitle to turn them off them again.

If the host has not enabled Auto-transcription in the meeting, participants can send a request to the host. To send a request to the host, click Live Transcript and then Request Live Transcription. The host will receive a notification and can choose to Enable or Decline the request.
Limitations of Zoom Live Transcription
- Live transcription is not captured in Zoom recordings. To enable audio transcription on Zoom cloud recordings please see the section below on Zoom audio transcription.
- Live transcription in Zoom currently only supports English.
- Live transcription is currently not supported in breakout rooms.
Microsoft Teams live captions
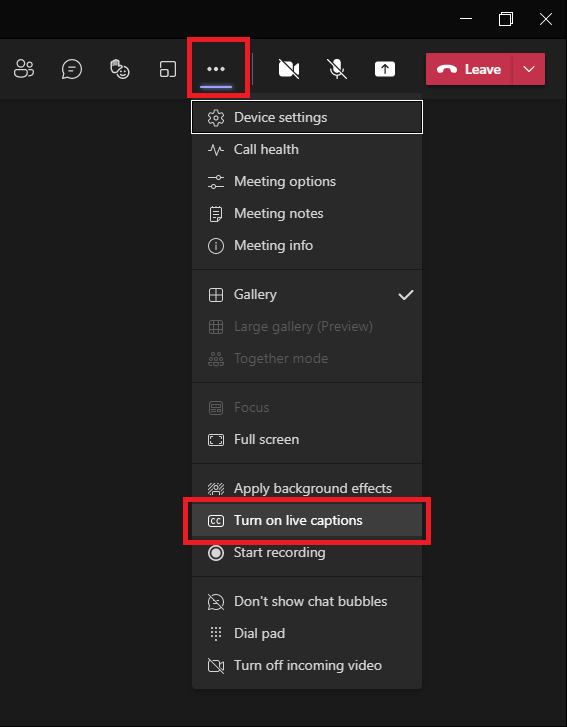
Microsoft Teams provides live captioning during a meeting. You simply turn them on when you’re in the meeting by clicking the three dots ‘…‘ towards the top right corner of the meeting window, then choosing ‘turn on live captions’ from the menu.
Auto-captioning recordings of sessions or meetings
It is possible to add captions to previously recorded sessions and videos. When closed-captions or subtitles are available on a video, there will be a clickable ‘cc’ (closed-captions) icon on the play bar.
Chrome Live Captions
As mentioned previously in this article, Chrome live captions will automatically create captions on any audio and videos accessed within the browser so this can be used to provide captions on session recordings.
Panopto
When you upload a video to Panopto, captions will be generated automatically and will be available during playback. It is possible to edit captions in Panopto, if required.
Note: Auto-captions won’t become available immediately after uploading a video or audio file to Panopto as they will need a short time to be generated.
Zoom audio transcription
You can turn on the audio transcription setting in Zoom which will generate auto-captions and a transcript on Zoom recordings saved to the cloud.
It is possible to edit the transcript in Zoom if required. The transcript will appear alongside the Zoom recording and you can search for key words to help find relevant sections of the recording and jump to them more easily. The transcript can be downloaded and opened in a variety of applications, if required.
Note: You will need to enable this feature before you start recording and choose record to the cloud.
YouTube Closed Captioning
YouTube will automatically generate caption when you upload a video. It is possible to edit the captions in YouTube, if required.
There is guidance on how to access your Sheffield Hallam Google account if you would like to access and upload to your Hallam YouTube account.
Note: To upload videos that are longer than 15 minutes, you will need to verify your YouTube account.